


You must be logged into post a comment.
Devin's Tech Blog
A technology blog with How-To and Informational posts.
Having Problems Upgrading to Windows 10?
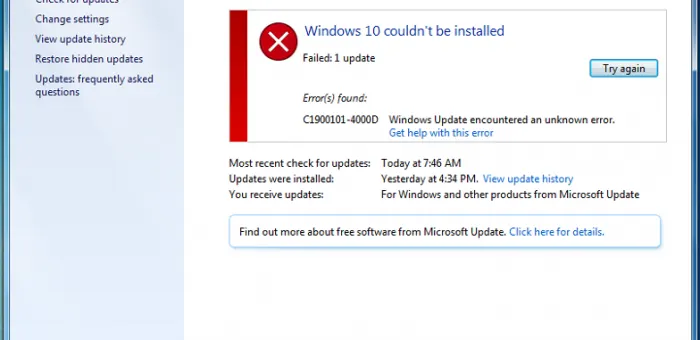
Have you been getting the generic “Windows 10 couldn’t be installed” message when you tried to upgrade your computer to Windows 10? Here are a few things you can try to get your computer to do the upgrade.

I’ve been upgrading a lot of computers to Windows 10 over the past couple months, and I’ve had a lot of them give me strange errors causing the upgrade to fail. I have seen the above image so many times I thought it would be a good idea to make a post about some of the issues I have ran into to help anyone else has had the same experience. I will first quickly go through performing the upgrade the normal way, then will describe what I have done to get around failures.
User Account
The first thing you need to do is make sure you start out correctly. Installing Windows 10 usually works best when installed by a Local System Administrator account. I have had good experience with Domain Administrator accounts as well, but I recommend always making sure your an Administrator prior to starting the upgrade.
Updates
Always be sure to check your system for any updates from Microsoft Update. You can access Microsoft Update by launching the Control Panel. Switch the view from “Categories” to “Small Icons” and toward the bottom of the window you will see “Windows Update” click that. Where you see “You receive updates:” Click the link to “Check online for updates from Microsoft Update” install any available updates including system drivers. You will want to make sure you have the latest drivers on your system prior to performing the upgrade. After installing any upgrades, reboot your computer whether Windows tells you to or not. After the reboot check for updates again and keep installing updates until Windows Update says “Your System is up to date” or “Upgrade to Windows 10” as in the image below:

Perform the Upgrade
The first thing to do is try to use the build-in methods. To “Get Windows 10” you can launch the upgrade program by clicking “Get started” in Windows Update. Alternatively you can click the upgrade image that should be in your system tray. It looks something like this: ![]() It will launch the Windows 10 upgrade screen where you can click “Start your free upgrade”. It will launch Windows Update to continue the process. From this point you should simply follow the prompts to start the upgrade process.
It will launch the Windows 10 upgrade screen where you can click “Start your free upgrade”. It will launch Windows Update to continue the process. From this point you should simply follow the prompts to start the upgrade process.
That concludes the “normal” upgrade process portion of installing Windows 10. Your system will reboot several times and it *should* start back up with Windows 10. However this blog post is about what happens when things go wrong.
When the Upgrade Fails
If you got the dreaded “failed” message, and you have all the latest updates and done everything correctly up to this point here are a few things that might help you:
The Media Creation Tool
The first thing I always try after a failed upgrade is simply to use the Media Creation Tool from Microsoft as an Administrator. You can download it here: Windows Media Creation Tool Once that is downloaded, you will want to right-click on it and choose the “Run as Administrator” option. After telling UAC (if you have it turned on) that it is ok to run the applicaton, you will be presented with a “License Terms” page. Click “Accept” then you should see this window:

Make sure the “Upgrade this PC now” option is selected, and choose “Next”. Your computer will now download the upgrade files and create the installation media. When it is done, you will have another “License Terms” page to click “Accept” on, then it will ask you what to keep. I usually just accept the defaults. Then the installer will check for updates, this step takes awhile. When finished it will verify once more that your PC is capable of running Windows 10 before displaying the installation screen:

Click “Install” and the your computer should go through the rest of the installation process automatically.
On Domain PCs
If the computer you are working with is on a domain and failed the normal upgrade process, (upgrading a computer without removing it from the domain should not be a problem normally) and if it also failed the Media Creation Tool method, it may be necessary to remove it from the domain. Remove your machine from the domain, reboot, and I usually turn off the firewall prior to starting the upgrade.

Now that your machine is off the domain and your firewall is turned off, go ahead and launch the Media Creation Tool. This will start the upgrade process again. I have had good luck using the Media Creation Tool, and haven’t tried using the built-in app after removing the machine from the domain. When the upgrade is complete you can re-add your machine to the domain and enjoy Windows 10.
Visual C++ Runtime Library error
Sometimes during the upgrades after the second reboot, I had a “Microsoft Visual C++ Runtime Library” screen pop up that partially loaded. I closed the window, the machine reboots and restores to its previous Windows 7 state. One way I have been able to get around this is uninstalling the “Visual C++ Redistributable 2010” package from “Add or Remove Programs”. Removing that program didn’t always fix the problem but worked in a couple cases so I am adding it as a possibility.
I hope this guide helps you get your free Windows 10 upgrade before its too late! If you have any other methods that helped you get Windows 10 upgrades installed on your computer, please post them in the comments so they might help others.